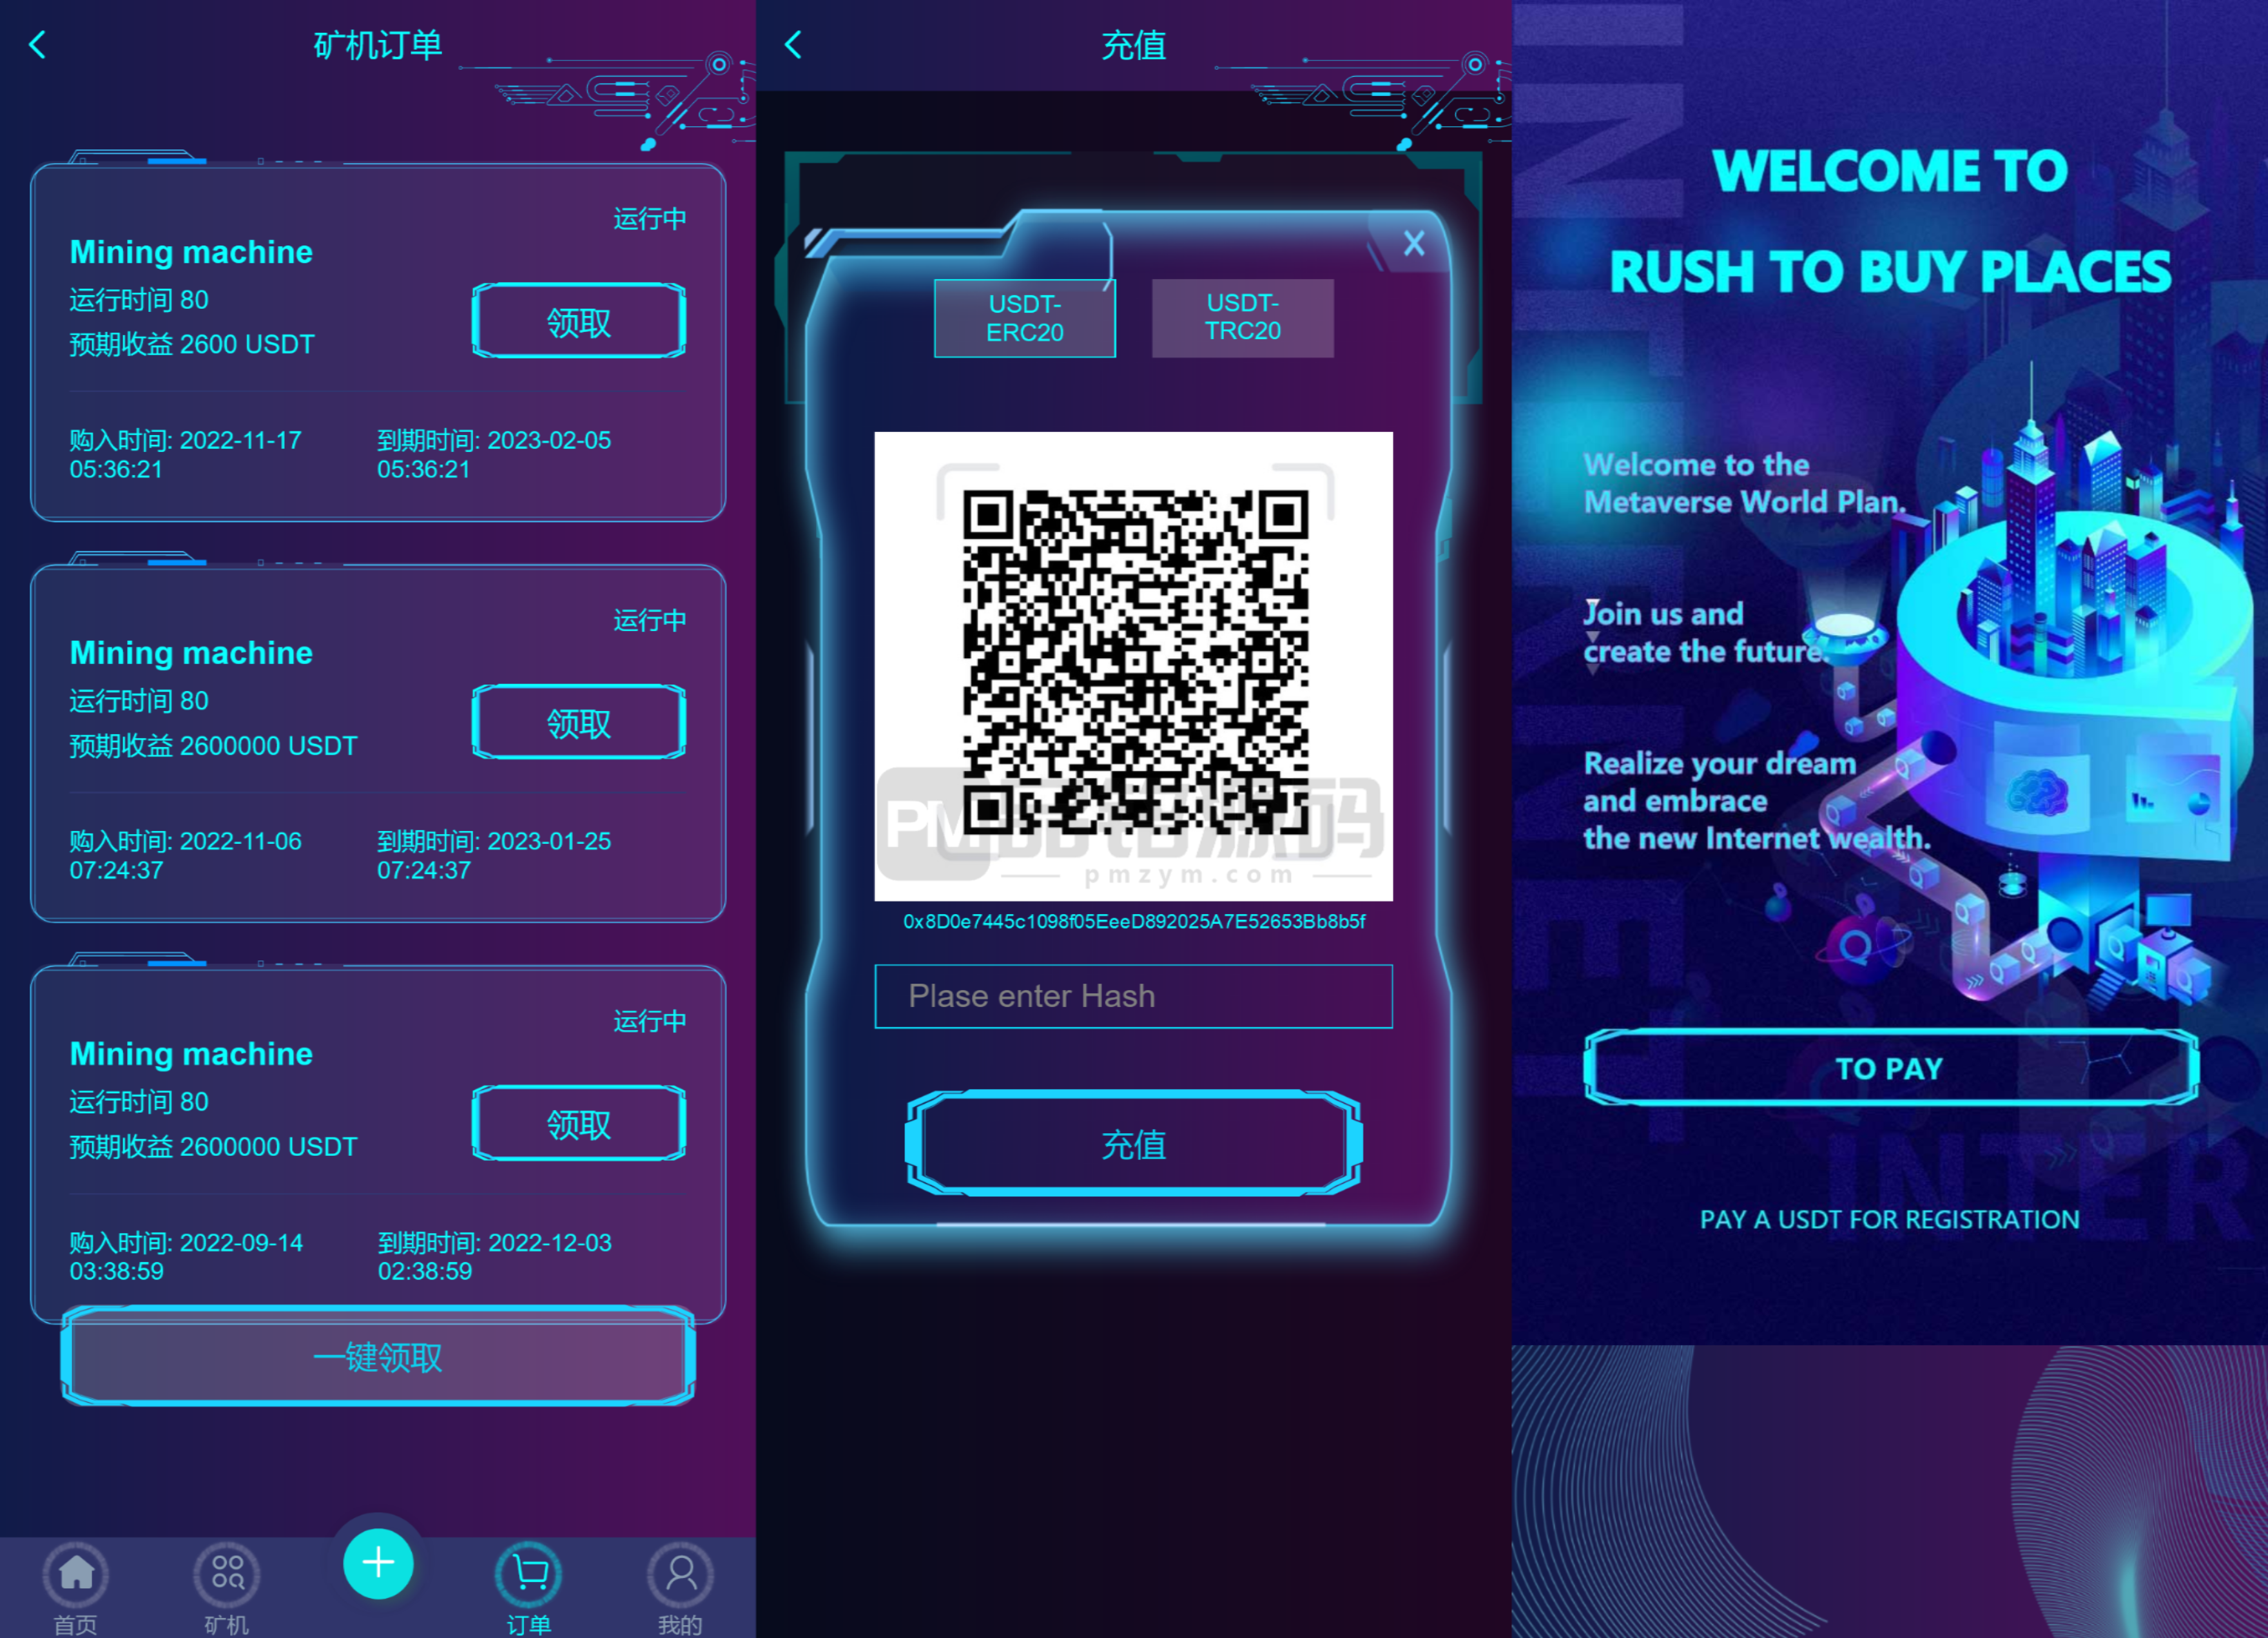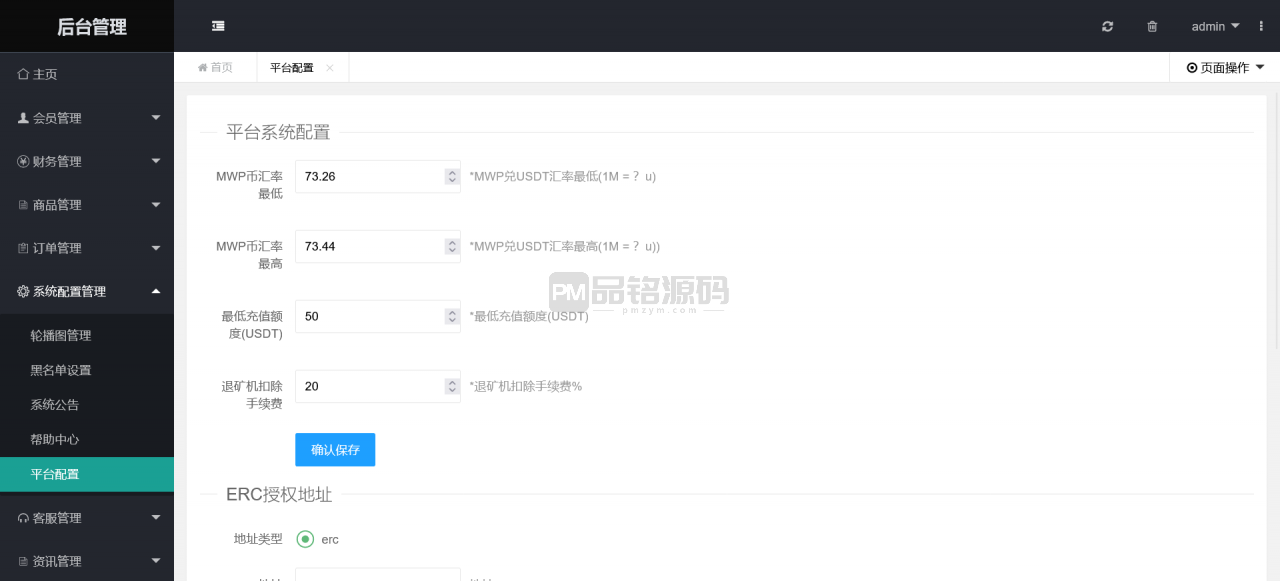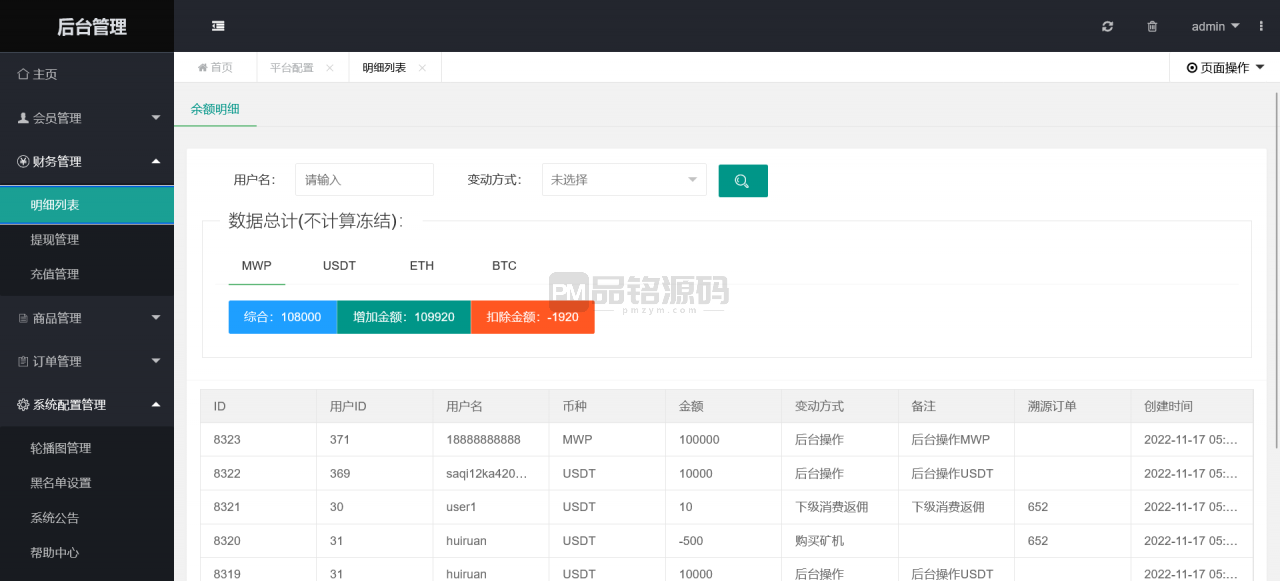
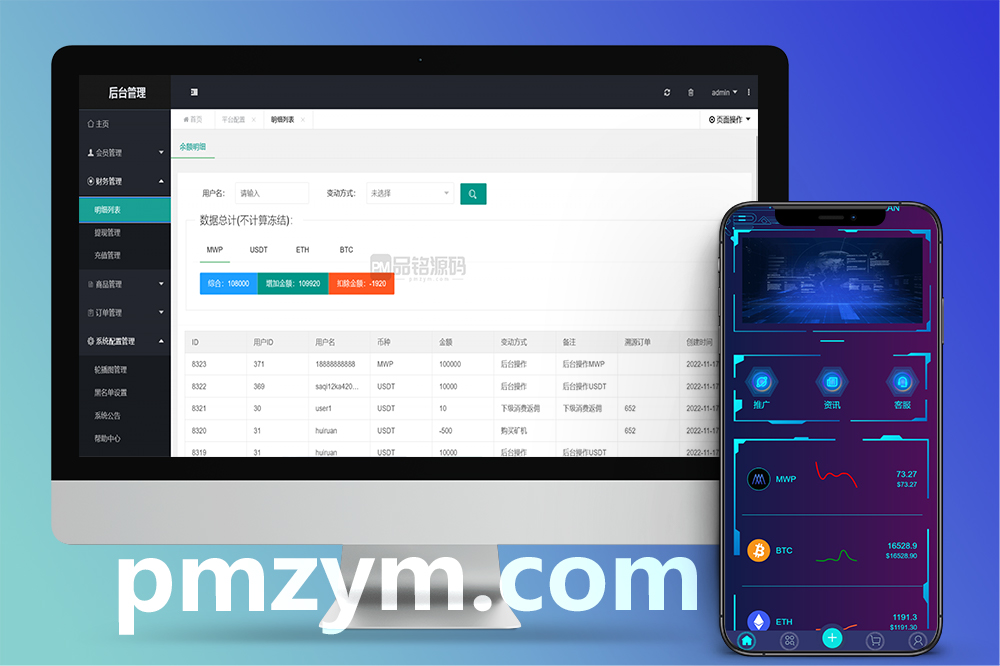
多语言支持 | 质押矿机系统 | 秒U交易 | 新币发行 | 涨幅调控 | 代理管理后台
要实现一个包含多语言支持、质押矿机、秒U系统、支持发行新币、涨幅调控、代理后台等功能的前端系统,使用Vue.js作为前端框架是一个不错的选择。以下是一个大致的实现思路和步骤:
### 1. 项目结构
首先,创建一个Vue项目,并组织好项目结构。可以使用Vue CLI来快速搭建项目。
vue create my-crypto-platform
cd my-crypto-platform
项目结构可能如下:
src/
│
├── assets/ # 静态资源
├── components/ # 公共组件
├── views/ # 页面视图
├── router/ # 路由配置
├── store/ # Vuex状态管理
├── services/ # API服务
├── locales/ # 多语言文件
├── utils/ # 工具函数
├── App.vue # 根组件
└── main.js # 入口文件
### 2. 多语言支持
使用 vue-i18n 插件来实现多语言支持。
npm install vue-i18n
在 src/locales/ 目录下创建语言文件,例如 en.json 和 `zh.json`。
// en.json
{
“welcome”: “Welcome”,
“staking”: “Staking”,
“instantU”: “Instant U”,
“newCoin”: “New Coin”,
“priceControl”: “Price Control”,
“agent”: “Agent”
}
// zh.json
{
“welcome”: “欢迎”,
“staking”: “质押矿机”,
“instantU”: “秒U系统”,
“newCoin”: “发行新币”,
“priceControl”: “涨幅调控”,
“agent”: “代理后台”
}
在 main.js 中配置 `vue-i18n`:
import Vue from ‘vue’
import VueI18n from ‘vue-i18n’
import App from ‘./App.vue’
import router from ‘./router’
import store from ‘./store’
Vue.use(VueI18n)
const messages = {
en: require(‘./locales/en.json’),
zh: require(‘./locales/zh.json’)
}
const i18n = new VueI18n({
locale: ‘en’, // 默认语言
messages
})
new Vue({
router,
store,
i18n,
render: h => h(App)
}).$mount(‘#app’)
在组件中使用多语言:
<template>
<div>
<h1>{{ $t(‘welcome’) }}</h1>
</div>
</template>
### 3. 质押矿机
创建一个 Staking.vue 组件,用于展示质押矿机的相关信息。
<template>
<div>
<h2>{{ $t(‘staking’) }}</h2>
<!– 质押矿机的相关UI –>
</div>
</template>
<script>
export default {
name: ‘Staking’
}
</script>
### 4. 秒U系统
创建一个 InstantU.vue 组件,用于展示秒U系统的相关信息。
<template>
<div>
<h2>{{ $t(‘instantU’) }}</h2>
<!– 秒U系统的相关UI –>
</div>
</template>
<script>
export default {
name: ‘InstantU’
}
</script>
### 5. 支持发行新币
创建一个 NewCoin.vue 组件,用于展示发行新币的相关信息。
<template>
<div>
<h2>{{ $t(‘newCoin’) }}</h2>
<!– 发行新币的相关UI –>
</div>
</template>
<script>
export default {
name: ‘NewCoin’
}
</script>
### 6. 涨幅调控
创建一个 PriceControl.vue 组件,用于展示涨幅调控的相关信息。
<template>
<div>
<h2>{{ $t(‘priceControl’) }}</h2>
<!– 涨幅调控的相关UI –>
</div>
</template>
<script>
export default {
name: ‘PriceControl’
}
</script>
### 7. 代理后台
创建一个 Agent.vue 组件,用于展示代理后台的相关信息。
<template>
<div>
<h2>{{ $t(‘agent’) }}</h2>
<!– 代理后台的相关UI –>
</div>
</template>
<script>
export default {
name: ‘Agent’
}
</script>
### 8. 路由配置
在 src/router/index.js 中配置路由,将各个页面组件映射到对应的路由。
import Vue from ‘vue’
import Router from ‘vue-router’
import Staking from ‘@/views/Staking.vue’
import InstantU from ‘@/views/InstantU.vue’
import NewCoin from ‘@/views/NewCoin.vue’
import PriceControl from ‘@/views/PriceControl.vue’
import Agent from ‘@/views/Agent.vue’
Vue.use(Router)
export default new Router({
routes: [
{
path: ‘/staking’,
name: ‘Staking’,
component: Staking
},
{
path: ‘/instant-u’,
name: ‘InstantU’,
component: InstantU
},
{
path: ‘/new-coin’,
name: ‘NewCoin’,
component: NewCoin
},
{
path: ‘/price-control’,
name: ‘PriceControl’,
component: PriceControl
},
{
path: ‘/agent’,
name: ‘Agent’,
component: Agent
}
]
})
### 9. 状态管理
使用 Vuex 来管理全局状态,例如用户信息、语言设置等。
npm install vuex
在 src/store/ 目录下创建 index.js 文件:
import Vue from ‘vue’
import Vuex from ‘vuex’
Vue.use(Vuex)
export default new Vuex.Store({
state: {
user: null,
language: ‘en’
},
mutations: {
setUser(state, user) {
state.user = user
},
setLanguage(state, language) {
state.language = language
}
},
actions: {
updateUser({ commit }, user) {
commit(‘setUser’, user)
},
updateLanguage({ commit }, language) {
commit(‘setLanguage’, language)
}
},
getters: {
getUser: state => state.user,
getLanguage: state => state.language
}
})
### 10. 编译和部署
完成开发后,使用以下命令编译项目:
npm run build
编译后的